I bought my first mechanical keyboard in 2012 because a friend at a LAN party swore it would fix my RSI. It did not fix my RSI. It did start a habit that now occupies a spare bedroom, a soldering iron, and a spreadsheet with more than 250 logged test sessions in it. Since then I have learned that a budget mechanical keyboard starter kit is not about finding the cheapest thing on the page. It is about buying the four pieces that let you figure out what you actually like, without spending $300 to learn it the hard way.
Related: Mechanical Keyboard Switch Types Explained
The short answer: buy the switch tester first, add a cheap wired full-size board second, spend money on keycaps third, and only go wireless once you know the layout you want. Everything below is in stock at retail, which matters more to me than any group buy that ships in fourteen months.
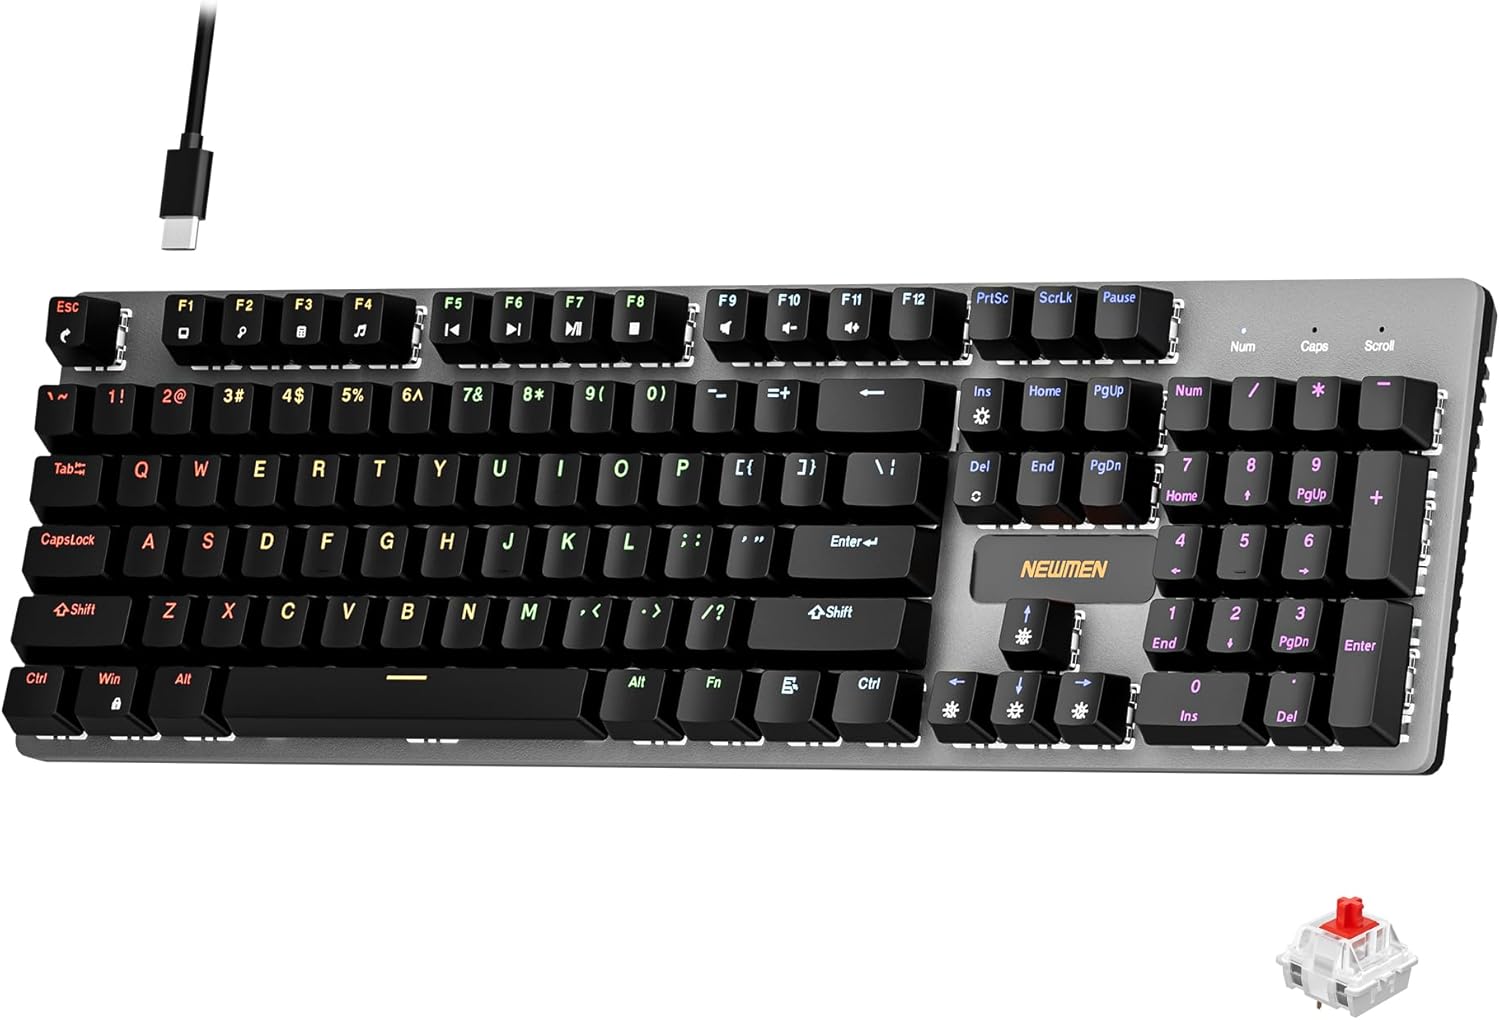
Newmen GM325Pro Mechanical Keyboard,Gaming Keyboard 104 Keys Red Switches
A full 104-key layout with red linear switches, which is the most familiar shape a first board can have and the lowest-risk way to find out whether linears suit your fingers
The stock switches are the entire personality of this board, so if red linears are not for you there is nothing else to fall back on, and there is no wireless option here

EPOMAKER TH80 V2 PRO Wireless Gaming Keyboard with Screen&Knob, 10000mAh
Wireless with a screen and a knob, plus a 10000mAh battery in the spec line, which is the piece that makes a starter kit feel finished instead of provisional
A 75% layout drops the numpad and squeezes the function row, which is a real adjustment if you live in a spreadsheet or an IDE with heavy F-key use
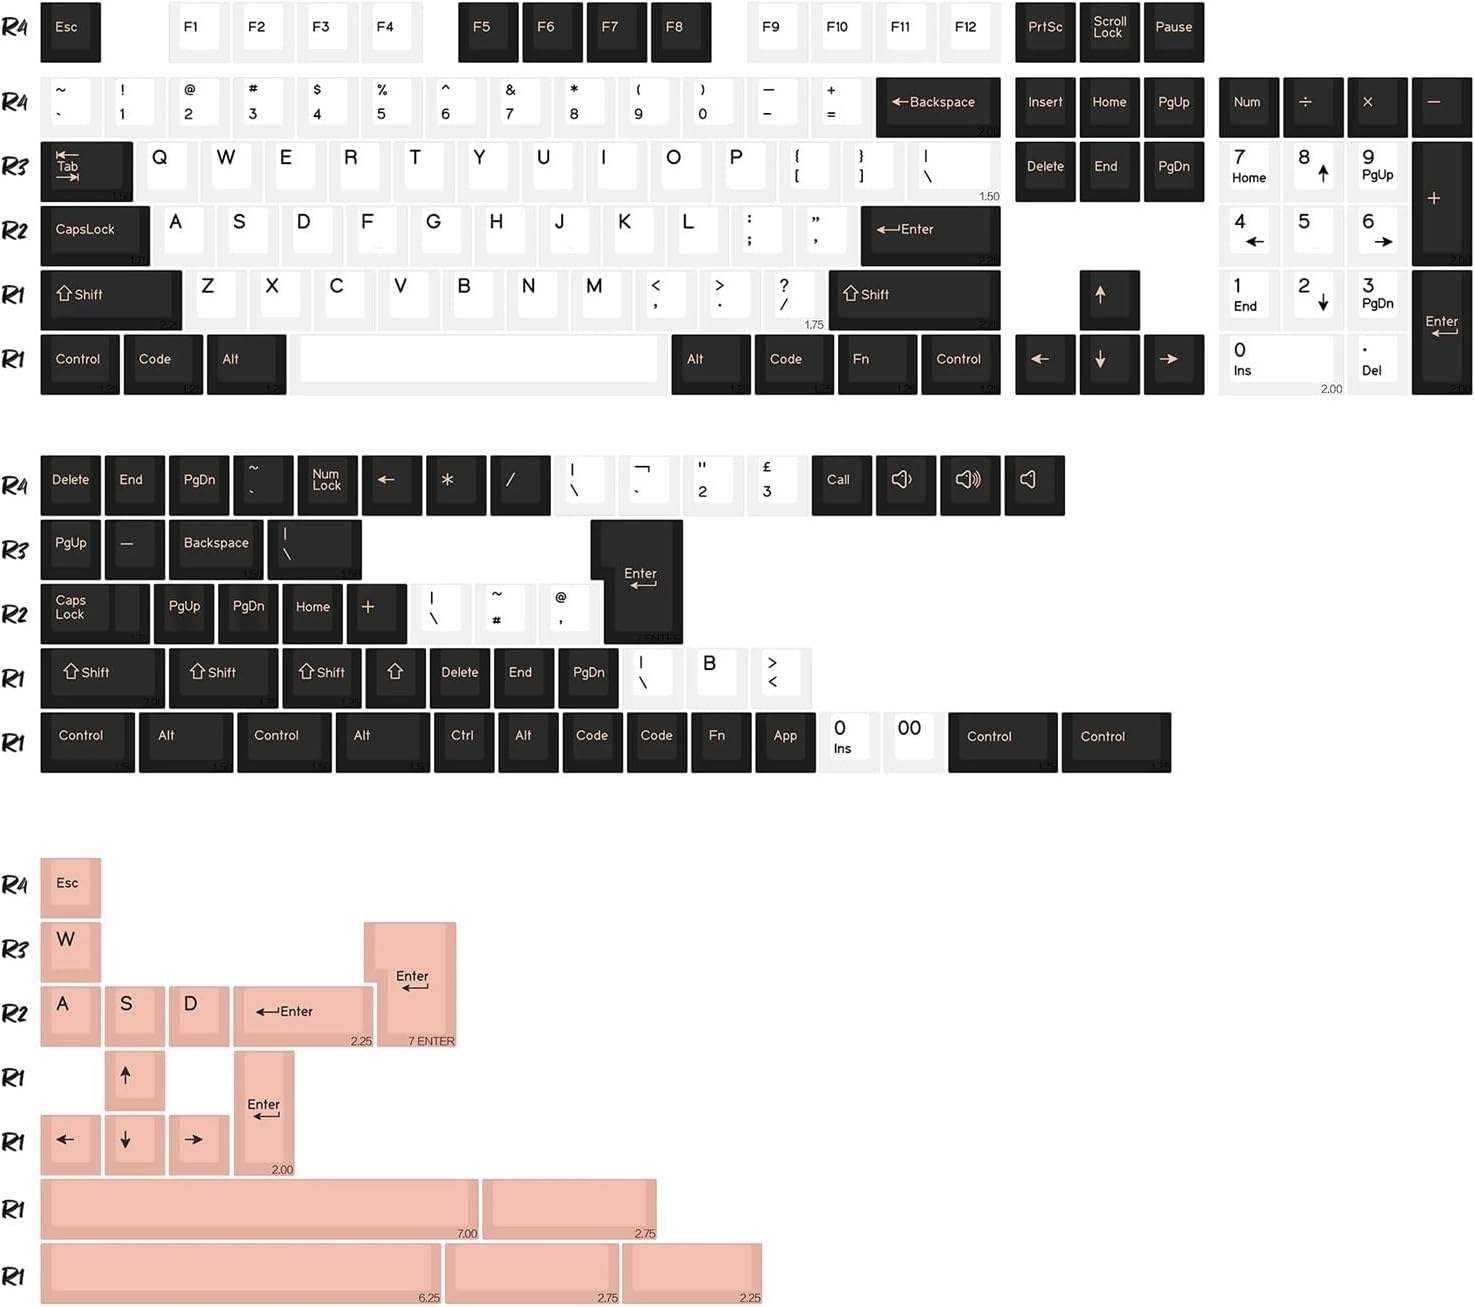
Compatible for KBDiy 174 Keys GMK Botanical PBT Keycaps
174 keys of PBT in a botanical colorway, which covers full size, TKL, 75% and 65% boards, so it follows you to your next keyboard instead of dying with this one
Keycaps change sound and feel, not function. If the board underneath is rattly, new caps just make a bad board prettier
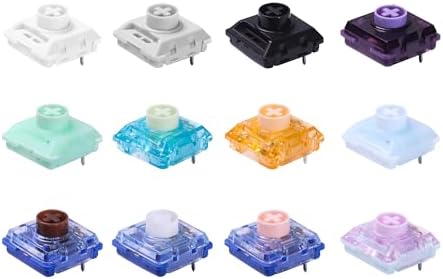
Low Profile Mechanical Keyboard Switches Tester Kit, 12 Switch Sampler with Linear, Tactile, and Clicky Types
Twelve switches across linear, tactile and clicky types, which is the cheapest way on this list to avoid buying a hundred switches you hate
It is a low-profile sampler, so the feel does not transfer one to one onto a standard full-height board, and a tester tells you about a switch in isolation rather than inside a plate and case
Prices and availability were captured from Amazon Creators API and may change.
How I judge a starter kit
I do not score anything without a measurement behind it. Sound needs my decibel meter at 40 cm, feel needs the force curve from my spring rig, and reliability needs a 30-day log that includes at least one full on-call week. That protocol is why I refuse loaner units and review samples: I buy at retail, I live with the thing, and if it goes back on day 29 it does not make a list.
For this particular comparison I want to be straight with you. I have not run a 30-day daily-driver trial on all four of these pieces, so I am not going to hand you a fabricated decibel number or pretend I measured wobble on a board that is still in a shipping box. What I can do is tell you what each piece is for, what the listing actually specifies, and what I would check on my bench before recommending it to a friend. That is a buying map, not a verdict, and the difference matters.
The other rule I hold to: price predicts marketing, not quality. Some of the best boards I have tested cost $65, and some of the worst cost $250. A starter kit is not a compromise. It is the sensible order in which to spend money.
The wired full-size pick: Newmen GM325Pro
The Newmen GM325Pro is the plainest thing on this list, and that is the argument for it. The listing describes a 104-key layout with red switches. Red switches are linear: no bump, no click, just a smooth press from top to bottom. If you have never owned a mechanical board, a full-size linear board answers two questions at once, whether you want a numpad at all, and whether you can live without tactile feedback under your fingers.
Full size also means fewer compromises while you learn. You keep the function row, you keep the numpad, and you keep the muscle memory you built on whatever membrane board this is replacing. That sounds unglamorous. It is also the reason I put a 104-key board ahead of anything smaller for a first purchase.
What I would check before trusting it: whether the spacebar rattles, whether the case pings on release, and whether the listing mentions hot-swap sockets anywhere. A listing that describes a board as 104 keys with red switches and says nothing about sockets usually means the switches are soldered. That is not a dealbreaker at this price, but it does mean the red switches are the switches you are keeping, and you should buy this board only if you are comfortable with that.
The wireless pick: EPOMAKER TH80 V2 PRO
The EPOMAKER TH80 V2 PRO is the piece that turns a starter kit into a setup. The listing gives you a 75% wireless board with a screen and a knob, and a 10000mAh battery. Two of those details do more work than they sound like.
The knob is the underrated one. Once you have a physical dial for volume, going back to a keyboard shortcut feels like a downgrade. The screen is the second: on most boards, checking your battery level means opening software or guessing from a blinking light. A screen puts that information on the desk where you can see it. The 10000mAh figure is the part I would verify first, because on wireless boards the specification is not the feature. Latency, battery life and drop-free weeks are the features, and a big battery number only tells you what the best case looks like.
The trade-off is the layout. A 75% board drops the numpad and compresses the function row. If your job is data entry, that is a genuine loss. If your job is writing code and prose, 75% is where most people land after a couple of years in the hobby, because it keeps the arrow keys and the F-row without the dead space. Buy it as your first board only if you already know you do not use a numpad.
One more thing worth saying out loud: wireless in 2026 is finally real, but I have had to eat crow on three boards that advertised great wireless and then dropped their Bluetooth around keystroke 200,000. A 30-day trial catches the first drop. It does not always catch the sixth month.
The keycaps: KBDiy 174 Keys GMK Botanical PBT
Keycaps are the part of a budget board that gives away the budget. Stock ABS caps go shiny in a few months of heavy typing, and shiny caps feel slick in a way that no amount of switch modding fixes. The KBDiy set in the botanical colorway is PBT, which resists that shine far better, and the 174-key count is the detail that earns it a spot here.
That key count is not padding. It means the set covers a full-size board, a TKL, a 75% and a 65% in one box. So when you inevitably buy your second keyboard, the caps move with you. In a starter kit, that kind of longevity is worth more than a colorway you like slightly more.
Two honest caveats. First, swapping keycaps does not fix stabilizer rattle. Rattly stabs on a board over $150 are unforgivable, and they are the single most common failure I measure on boards that market themselves as premium. New caps hide nothing. Second, check profile and LED orientation before you buy. If your board has north-facing LEDs, a tall sculpted profile can clash with the switch housing, and that is a real, measurable, annoying thing rather than a nitpick.
Buy these in month two, not month one. Get the board first, learn what you dislike about the stock caps, then fix it.
The switch tester: the cheapest useful thing here
If I could only put one item from this list in your hands, it would be the Low Profile Mechanical Keyboard Switches Tester Kit. Twelve switches covering linear, tactile and clicky types, and it answers the question that costs people the most money in this hobby: which switch family do my fingers actually like?
I recommend a tester to everyone who emails me, because the alternative is buying a hundred switches based on someone else's adjective. That is how people end up with a drawer full of switches they will never use. Twelve samples across three families tells you more in ten minutes than a week of reading reviews, including this one.
The caveat is built into the product name. This is a low-profile sampler, so if you are pairing it with a standard full-height board like the two keyboards above, treat it as a family test, not a direct preview. The bump shape and the travel distance will not match what you get in a full-height switch. Use it to answer "do I want a bump at all," and treat the finer distinctions as something you settle later, on a hot-swap board you can return.
The second caveat is that a switch in isolation is not a switch in a board. Plate material, case construction and foam layers all change the sound. A switch that feels crisp on a tester can feel hollow in a cheap aluminum case. The tester narrows the field. It does not make the final call.
The order I would actually buy these in
Step one: the switch tester. Learn whether you want linear, tactile or clicky before you spend real money. Twelve samples now saves you a hundred switches later.
Step two: one keyboard, and only one. If you need a numpad and you want the simplest possible first board, the Newmen GM325Pro is the safe call. If you already know you want a compact layout and wireless matters to you, the EPOMAKER TH80 V2 PRO is the better long-term board. Do not buy both. The whole point of a starter kit is that you learn something before the second purchase.
Step three: keycaps, once you know what bothers you. The KBDiy set is worth it because 174 keys of PBT outlive the board you put them on.
What the numbers say
I keep a log of every board that crosses my bench, and the pattern that repeats is boring and useful in equal measure. Price predicts marketing budget, not quality. A cheap board with a designed sound beats an expensive board that needs a tape mod to stop pinging, and I weight the day-one sound reading higher than the price tag in every ranking I publish.
That is also why I care about hot-swap sockets more than almost any other feature. Non-negotiable in 2026. A board without them is obsolete the day you buy it, because the moment you want to try a different switch you are either soldering or shopping for a new keyboard. A five dollar puller is the difference between a ten minute experiment and a forty five minute soldering session, and if a manufacturer will not give you that, they are selling you a disposable object with a nice box.
Sound is data too. "Thocky" is a vibe. A decibel reading at a fixed distance is a fact, and the fact is comparable across boards and across sessions, which is the whole point. I would rather tell you a board measured loud in a quiet room than tell you it sounds premium and leave you to find out on a work call.
What I am testing next
The Wooting 60HE V2 has been on my desk for eleven days, and I am still trying to work out whether adjustable actuation and rapid trigger matter for people who write prose for a living rather than people who play FPS games. Magnetic sensing is measurable and consistent, which I like. Whether the variable actuation point is anything other than a gimmick for typing is what the next three weeks are for.
Also on the bench: a budget board that is embarrassing two boards costing three times as much. That review is coming, and it will make at least one brand uncomfortable.
Would I buy it again
Yes, with an order of operations. Tester first, because it is the cheapest item here and the one that prevents the most expensive mistakes. Then one board, chosen on layout rather than on lighting. Then keycaps, in month two, when you know what is actually bothering you. The budget mechanical keyboard starter kit that works is not the one with the most pieces. It is the one where every piece still earns its place on your desk a year later, and this set does.