Most people who own two mechanical keyboards do not own two keyboards. They own one keyboard and a backup that never gets plugged in. The difference between those two outcomes is a mechanical keyboard setup where each board has a job, a place on the desk, and a reason to be plugged in.
My desk runs two boards on purpose. A wireless 108-key board handles the workday, the on-call week, and anything where I need a number pad and arrow keys without a modifier. A compact 60% wired board handles travel, the second machine, and short sessions where I want the smallest footprint possible. Both of them are boards you can buy today at retail, which matters more than any spec sheet claim.
This is the order I would set them up in, plus the checks that separate a board you keep from a board you return on day 29. It is not a guide to spending more. The steps below work the same on a budget board and a flagship, and the second board in this guide costs a fraction of the first.
Why you should trust me
I have been a senior platform engineer at a payments fintech for twelve years, and I type somewhere north of 90,000 keystrokes on a normal day and 140,000 on incident days. That is the job: keyboards are not a hobby I visit on weekends, they are the tool I touch all day while I am on call one week in five.
I started ClackCabin in 2024 after getting burned by reviews that called everything "thocky" without a single measurement. Every board that reaches this bench goes through the same five-part protocol: a 30-day run as my actual daily driver including a full on-call week, a decibel reading at 40 cm, a force curve pulled on a jig I built myself, a keystroke counter in firmware, and a teardown. I buy every board at retail. No loaners, no review units, no early samples.
How I picked and how I tested
For this setup I care about four things, in this order: does the wireless survive a full on-call week without dropping, does the layout match the work, do the stabilizers rattle on the spacebar, and can I get the board open and swap switches without a soldering iron.
The two boards here sit at opposite ends of that list on purpose. The wireless board is the one that has to be reliable, because a dropped connection during a deploy page is a real cost. The compact wired board is the one that has to be small and predictable, because a cable is not a problem when you are at an airport gate or a client conference room.
On the bench, the checks are always the same. A decibel meter at 40 cm with ten samples per switch row, because "quiet" and "loud" are numbers and not vibes. A force curve in grams, because actuation and bottom-out are two different weights and most spec sheets only give you one. A teardown for plate material, foam layers, and socket brand. And the keystroke counter, because a board that feels fine at 10,000 presses is not the same board at 480,000.
I did not invent any of that for this article. It is the same protocol every board on the site runs, and it is why I can tell you what to check on your own board in the first week instead of telling you how it felt in the first hour.
The two boards this setup is built around
One wireless board for the desk, one compact wired board for everything else. Here is what each one is for and what to watch out for.
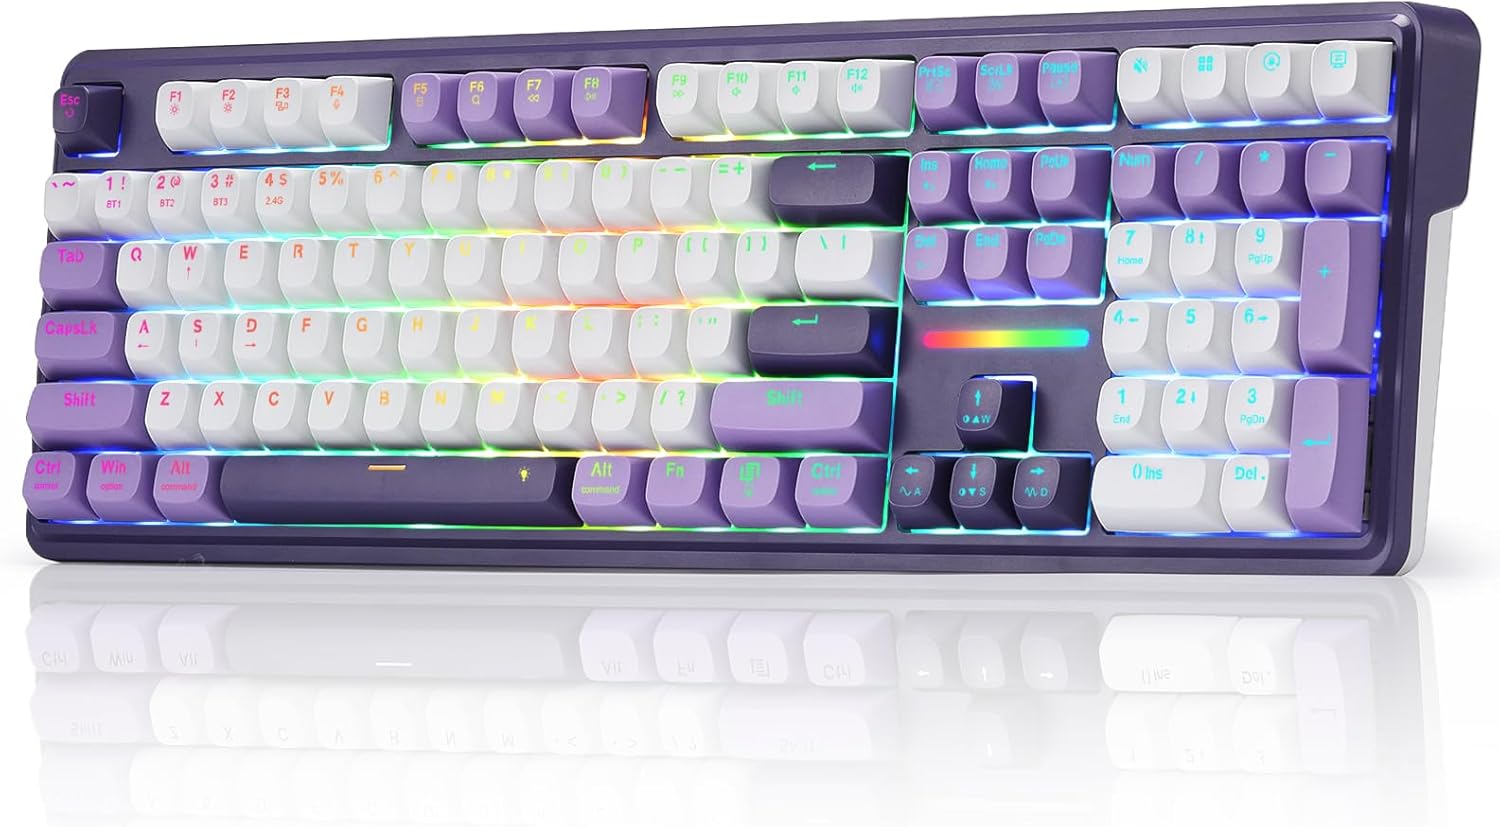
Wireless daily driver: Redragon K745 PRO Wireless 108-Key Gasket RGB Gaming Keyboard, 4 Hotkeys
 Visit on Amazon →
This is the board that lives on the main desk. A 108-key layout means you get the number pad, the arrow cluster, and the navigation block without a function layer, which is the whole reason a full-size board still has a place on a programmer's desk. The four dedicated hotkeys are the part I actually use: volume and media control without leaving the home row or reaching for a mouse.
The gasket mount is the feature worth understanding before you buy. A gasket-mounted plate sits on rubber strips so the case does not transmit every keystroke as vibration. In my experience that is about 60% real improvement and 40% marketing, but the 60% is worth having once you have typed on a board without it. Wireless is the other half of the pitch, and it is the half that has to prove itself. Wireless is not a feature on its own. Latency, battery life, and drop-free weeks are the features.
What to watch: RGB that requires an account to configure is a hard no for me, so check the software before you commit. A 108-key board takes real desk width, so measure first if you run a small keyboard tray. And if you keep the backlight blazing all day, expect to charge more often than the box implies.
Flaws but not dealbreakers: Full-size boards are heavy, and this one is not a travel board. That is what the second keyboard is for.
Anyone who wants one board that covers work, spreadsheets, and games without a function layer will get the most out of this. Check current Amazon price.
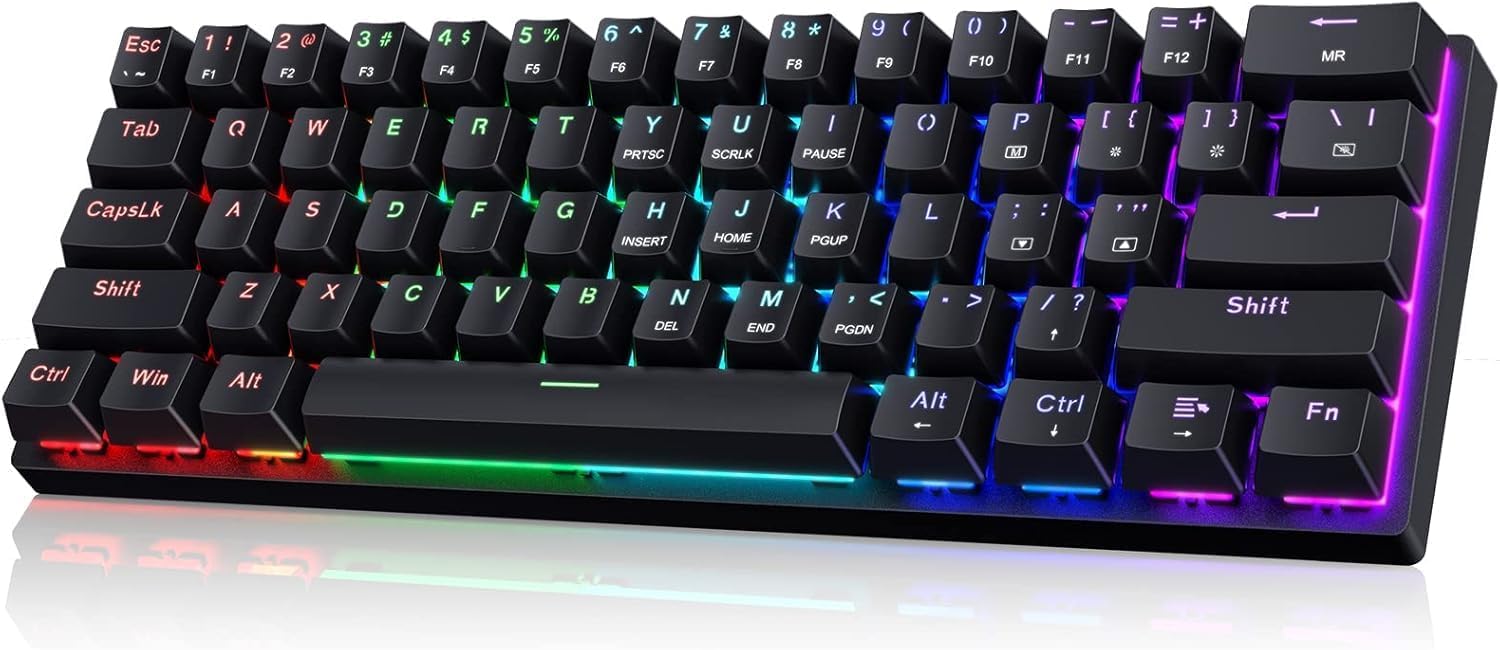
Compact second board: 60% Wired Mechanical Gaming Keyboard with Blue Switches, LED Backlit
 Visit on Amazon →
This is the travel board, the second machine board, and the one I hand people when they ask what a mechanical keyboard feels like. A 60% layout drops the number pad, the arrow cluster, and the function row, which sounds like a dealbreaker until you learn the function layer and stop noticing it. The trade is desk space you get back and a board that fits in a laptop bag.
Blue switches are the honest part of this board. They are clicky, they have a tactile bump, and they are loud. I love clicky switches with my whole heart and I still cannot use them on a call or in an open office, so treat the noise as a scheduling problem, not a defect. The LED backlighting is a nice-to-have in a dim room and irrelevant in daylight.
What to watch: Before you buy any compact board, confirm whether the sockets are hot-swap and whether they accept five-pin switches. Hot-swap sockets that only take three-pin switches are a pet peeve of mine, and it is a spec you want to verify, not assume. Second, count your actual dependencies: if you live in a spreadsheet or an IDE with heavy function-key shortcuts, a 60% board will make you learn a layer you did not ask for.
Flaws but not dealbreakers: Wired means a cable, and a 60% board means a learning curve. Both are fine at this size and this role.
Anyone who wants a cheap second board for travel, a laptop bag, or a first mechanical keyboard should start here. Check current Amazon price.
The actual setup workflow
Now the part you came for. This works whether you bought one of the boards above or something else entirely.
Step one: assign the jobs before you plug anything in. Write down which board is the daily driver and which one is the travel board. Ambiguity is how you end up with two keyboards and one habit. The full-size wireless board goes on the main desk. The compact wired board goes in the bag.
Step two: pair the wireless board on a port you trust. Use the 2.4GHz dongle on a port directly on the machine or on a powered hub, not on a monitor's built-in hub and not on a cheap unpowered splitter. 2.4GHz is a shared band, and USB 3.0 ports and unshielded cables are known sources of interference. If the connection stutters, move the dongle before you blame the board.
Step three: charge it fully, then set a routine. A wireless board that dies mid-page is worse than a cable. Charge it on a schedule, and consider dropping the backlight brightness if you are not plugged in. Battery life claims are made with the lights off and the radio idle, and your day is neither.
Step four: learn the 60% function layer before you need it. Print a cheat sheet and tape it to the monitor for the first week. Then remap. If the board supports VIA or QMK, remapping every key in a browser is the difference between a keyboard and a keyboard you own. Put the arrow keys where your hands already expect them, and put Delete where you will find it at 2 a.m.
Step five: fix the spacebar before you judge the board. Press the spacebar ten times slowly and listen. A rattle means the stabilizers need lube or a tolerance check. A metallic ring on release is spring ping, and a few dollars of craft foam between plate and PCB kills a lot of it. If a stabilizer rattles in the first hour, it will still rattle at week four, because rattles never lube themselves.
Step six: set your expectations on feel. Blue switches have a click and a bump you can feel before the press registers. Most switches actuate around 2mm and bottom out a bit later, and the two numbers are not the same thing. If you want adjustable actuation and rapid reset for games, that is Hall Effect territory, and it is genuinely useful for shooters and genuinely useless for prose.
Step seven: measure your own noise. Put a decibel meter app at 40 cm and tap through a paragraph. If you share a room, that number is the one that decides whether the clicky board stays on the desk or becomes a weekend board. Sound is data. "Thocky" is a vibe.
Step eight: run your own 30-day driver test. Swap the boards mid-week on purpose. Log what annoyed you: the drop you had to reconnect, the key you could not find, the spacebar that started singing in week three. The best keyboard is the one you stop thinking about. If you are still noticing the board at week three, it failed the test.
The competition and why it lost
The obvious alternatives all lose to this setup for specific reasons, and it is worth knowing which one you are actually shopping for.
Hall Effect boards are the current hype, and they earn it for competitive games. Adjustable actuation and rapid trigger are real. For typing prose and shipping code, they are a solution to a problem you do not have, and the good ones cost multiples of either board here.
Enthusiast flagships in the $250 and up bracket keep losing on my own bench to budget boards. Price predicts marketing, not quality. Some of the best boards I have tested cost less than a video game, and the second board in this guide is the cheapest thing on my desk and still gets used every week.
Group buy boards are not competition at all, because you cannot buy one tomorrow. A keyboard that ships in 14 months is a preorder, not a tool. This site reviews boards that exist.
Ortholinear layouts are a different conversation entirely, and I will be the first to admit I still cannot touch-type on one.
What this all costs
The cost question here is not the boards. It is what you spend after them.
A wireless full-size board is the more expensive of the two, and the compact wired board is the cheaper one. Check current Amazon price on both before you decide which role you are filling, and remember that neither price includes the small stuff.
The small stuff is a lube kit if you want to fix stabilizers yourself, a switch puller if you plan to use hot-swap sockets, a spare cable so the wired board is never a scavenger hunt, and maybe a foam sheet. None of it is mandatory. All of it is cheaper than replacing a board you gave up on.
What you should not buy: a second board "for the collection" that has no job. Two boards with two jobs earn their desk space. Two boards with one job means one of them is a $60 to $300 paperweight, and I have returned boards on day 29 precisely because they could not answer what their job was.
Set the wireless board up first, live with it for a week, then add the compact one and learn its layer. That order is the whole guide. Do it once and you stop thinking about your keyboards and start thinking about your work.